Moderator personal account
Signing in to your personal account
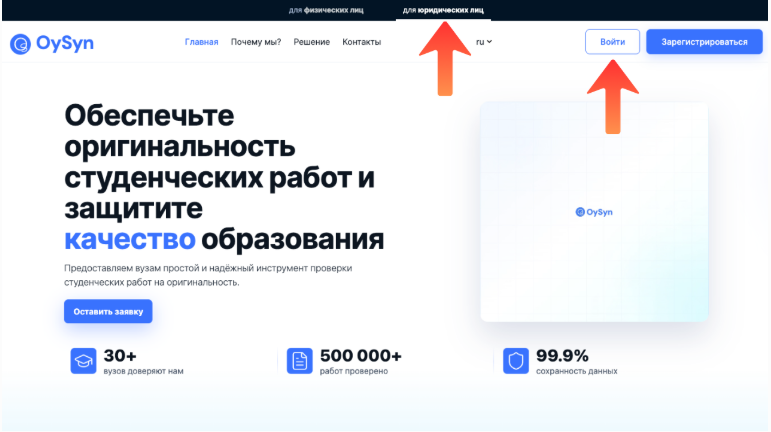
On the website OySyn.asia select the section “For legal entities” and click “Sign in”.
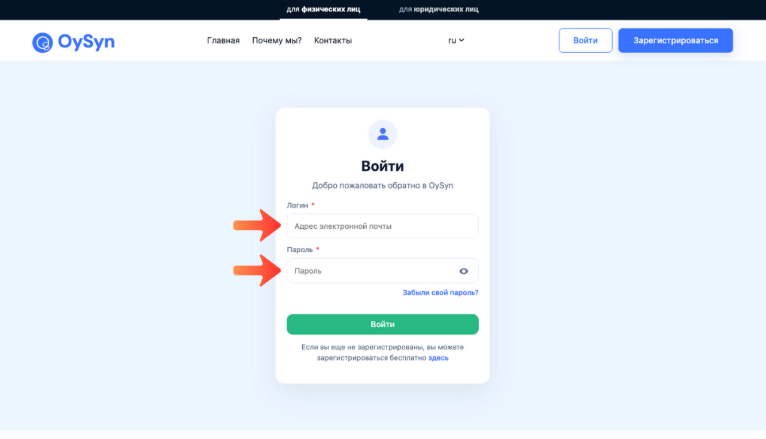
Enter email address and passwordprovided by the administrator or used when signing up.
Click “Sign in”.
Note
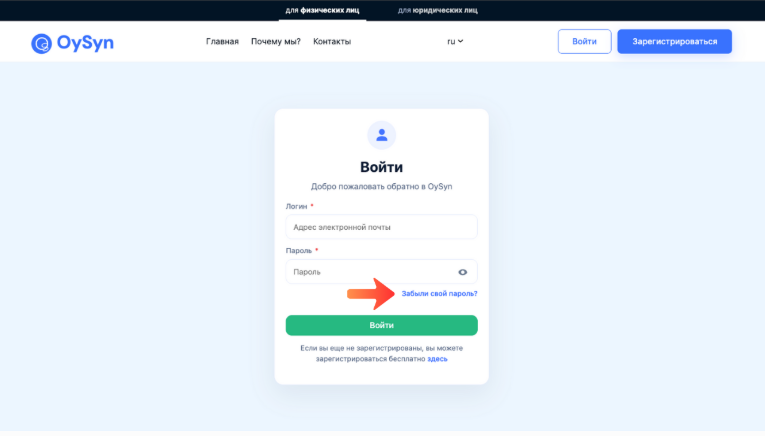
If you don't remember your password, click “Forgot your password?”.
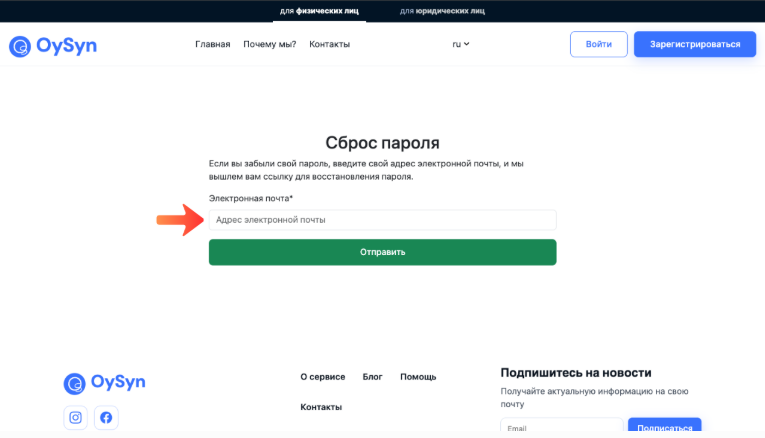
Enter email addressyou used when signing up, and follow the recovery instructions.
Working in your personal account
Click the avatar in the top right corner — this opens the menu.
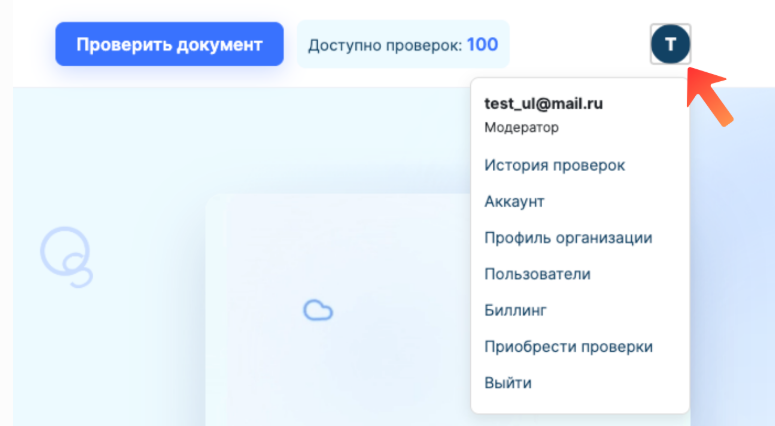
“Account” section
Profile (editing personal data)
Select “Account”.
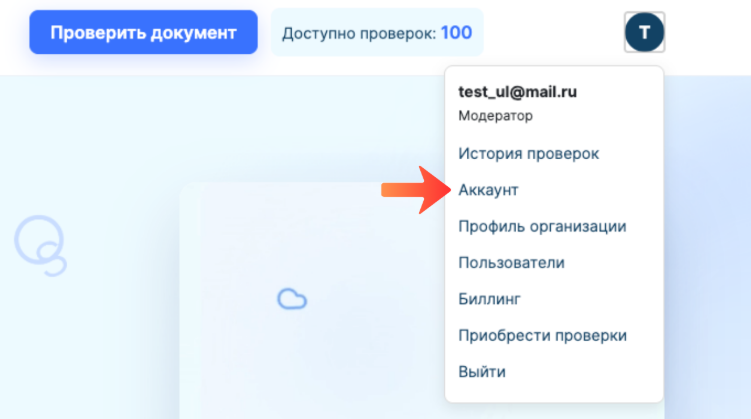
Select the section “Profile” → Click “Edit”.
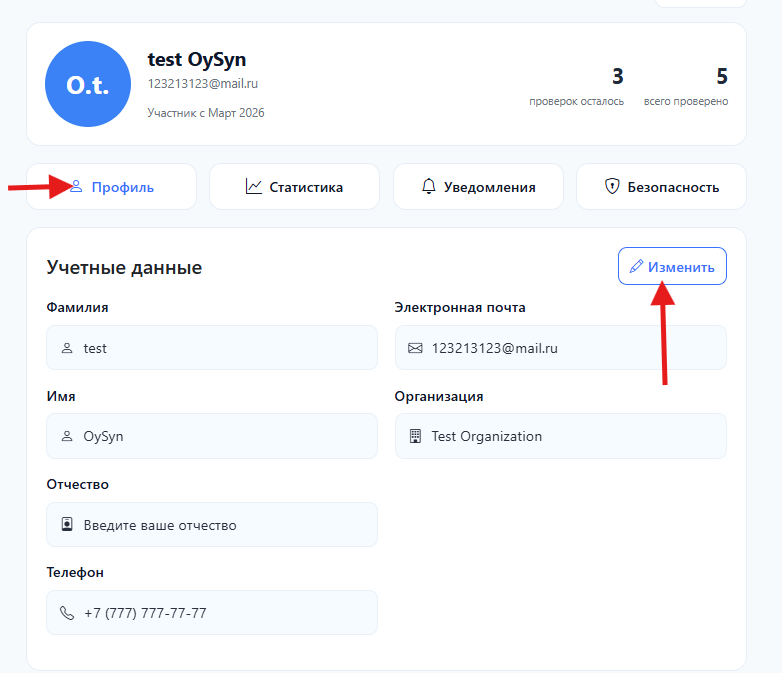
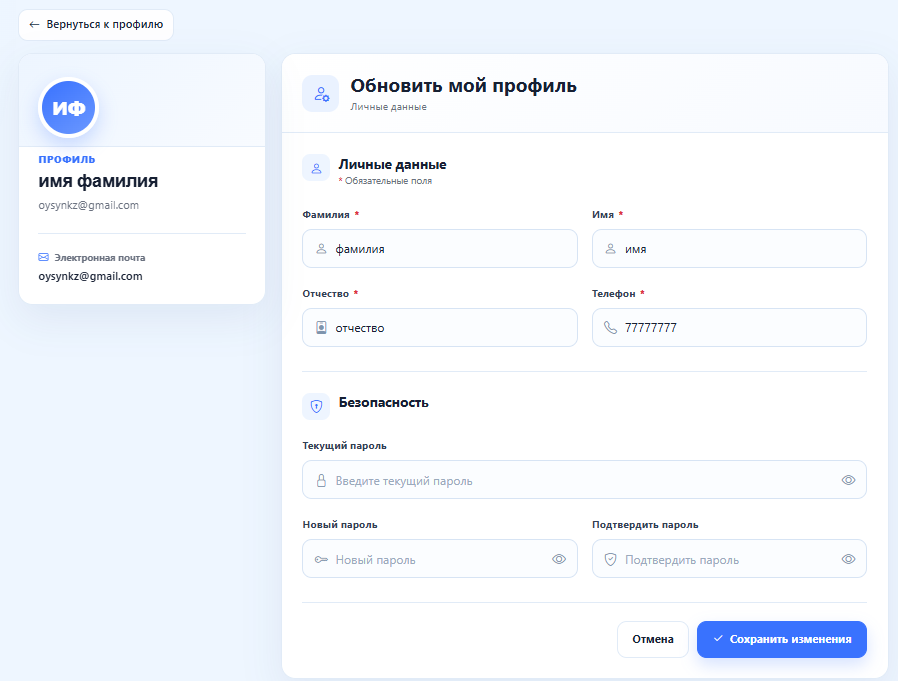
Fill in the fields: First name, Last name, Patronymic, postal code, phone.
Click “Edit” to save.
Statistics
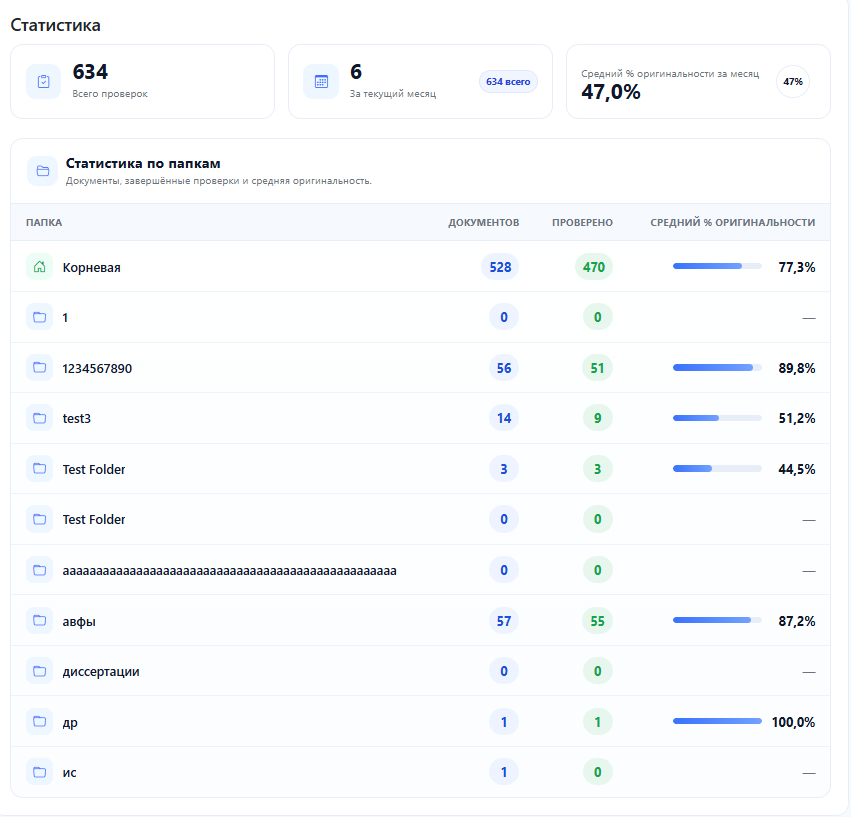
Select “Account” → section “Statistics”.
In this section you can see the total number of checks, checks this month and average originality percentage.
Notifications
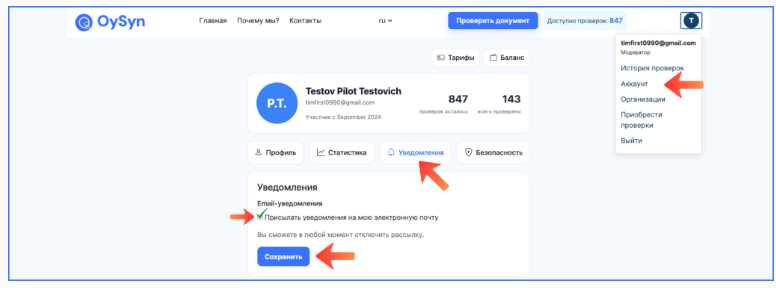
Go to “Account” → “Notifications”.
Turn on email notifications by ticking “Send notifications to my email”.
Click “Save”.
Security
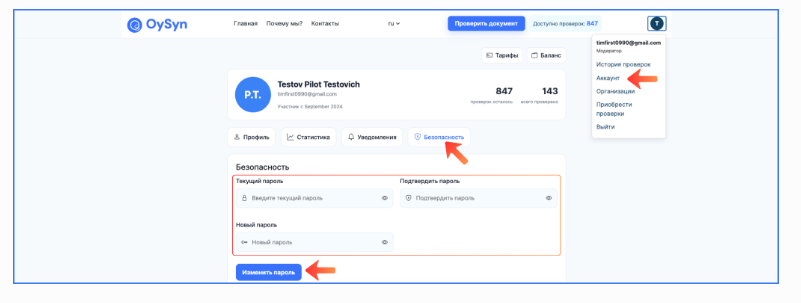
Open “Account” → “Security”.
Enter current password, new password and confirm it.
Click “Change password”.
“Organization profile” section
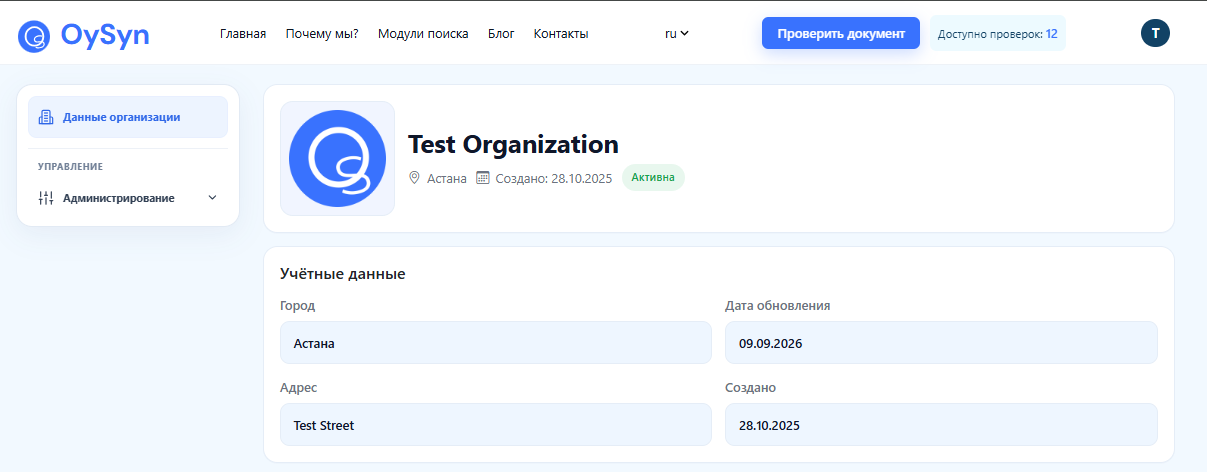
Go to the section “Organization profile”.
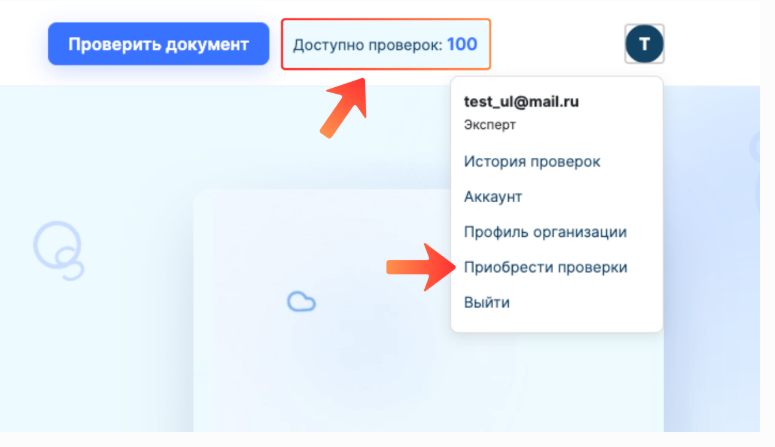
In the section “Organization profile” you can see all current information about the organization your account belongs to.
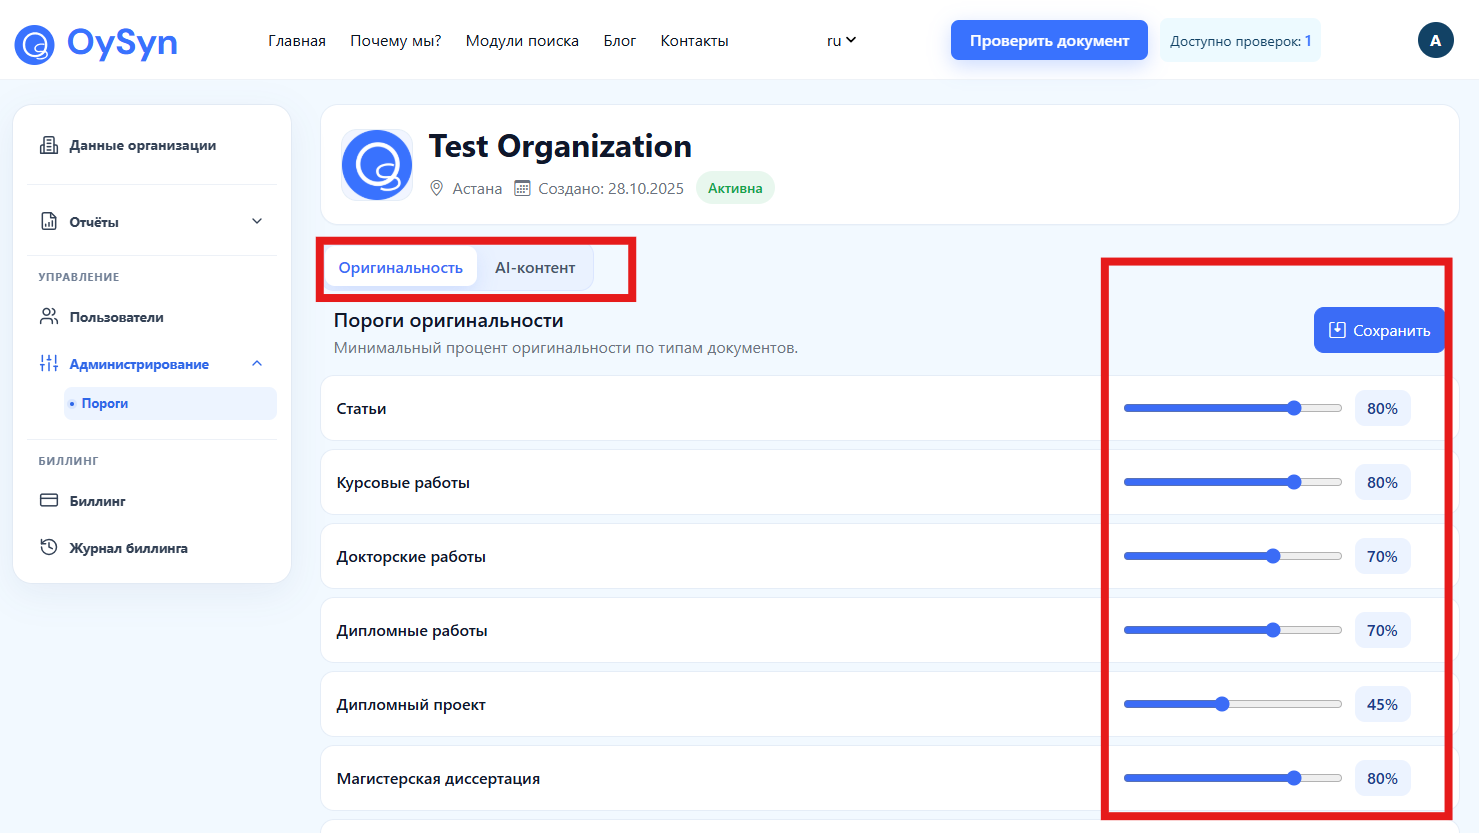
In the section “Administration” you can change the minimum originality and AI content percentage by document type. After making changes, don't forget to click the “Save”
“Reports” section
Go to the section “Reports*” then go to “Report builder*”. Here you can
Choose which blocks appear in reports for users of your organization in the “Full report”, “Short report” and “Certificate*”*
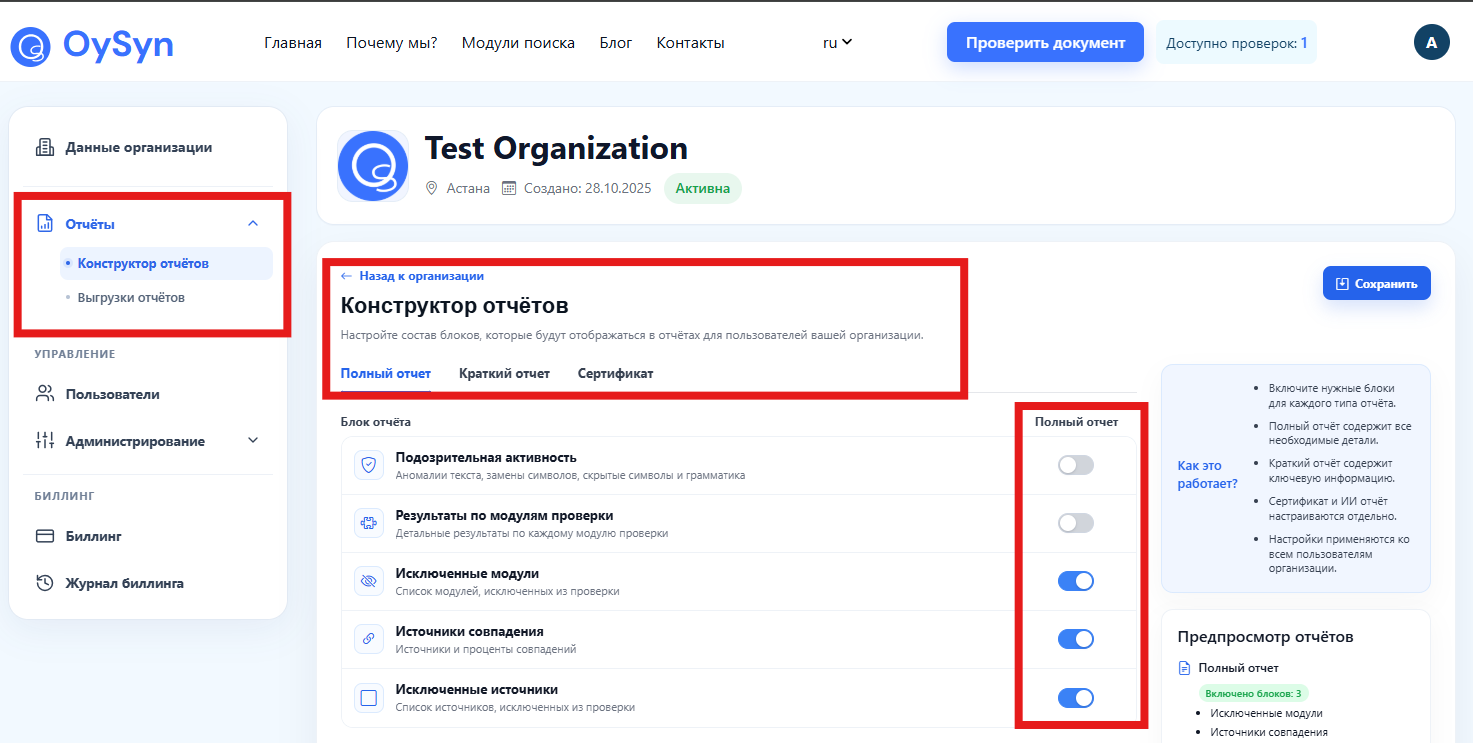
After all changes, click the “Save*”*
“Users” section
Go to the section “Users”. All employees of your organization are shown here.
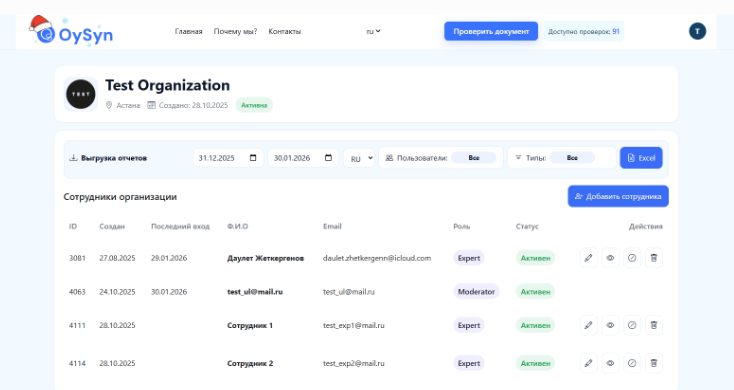
“Export” of a file with information about completed checks
Clicking the “Excel” button generates and automatically downloads a Microsoft Excel file with information about completed checks.
The generated table contains the following fields:
• User name — the user who ran the check
• Email — the email address of the user who ran the check
• Report title — the name of the generated report
• Created — date and time the report was generated
• AI, % — percentage of text the system classified as generated with artificial intelligence
• Originality, % — the text originality score
• Citations, % — share of correctly attributed borrowings
• Matches, % — share of detected incorrect borrowings
• Self-citations, % — share of borrowings from works by the same author
• Document file — name of the checked file
• Document status — current status of the report in the system
• Author — the author of the checked document
• Document type — category of the checked material

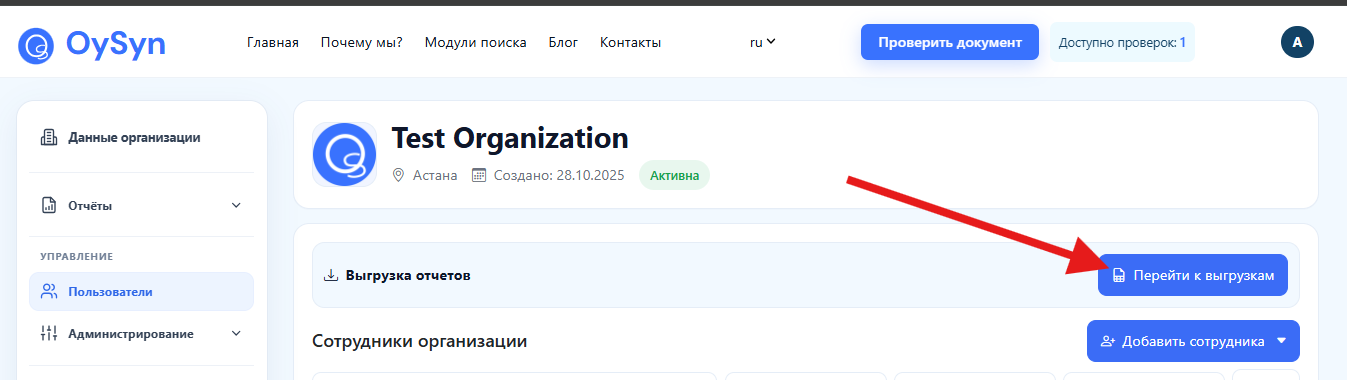
Add a new employee
Click the “Add employee”.
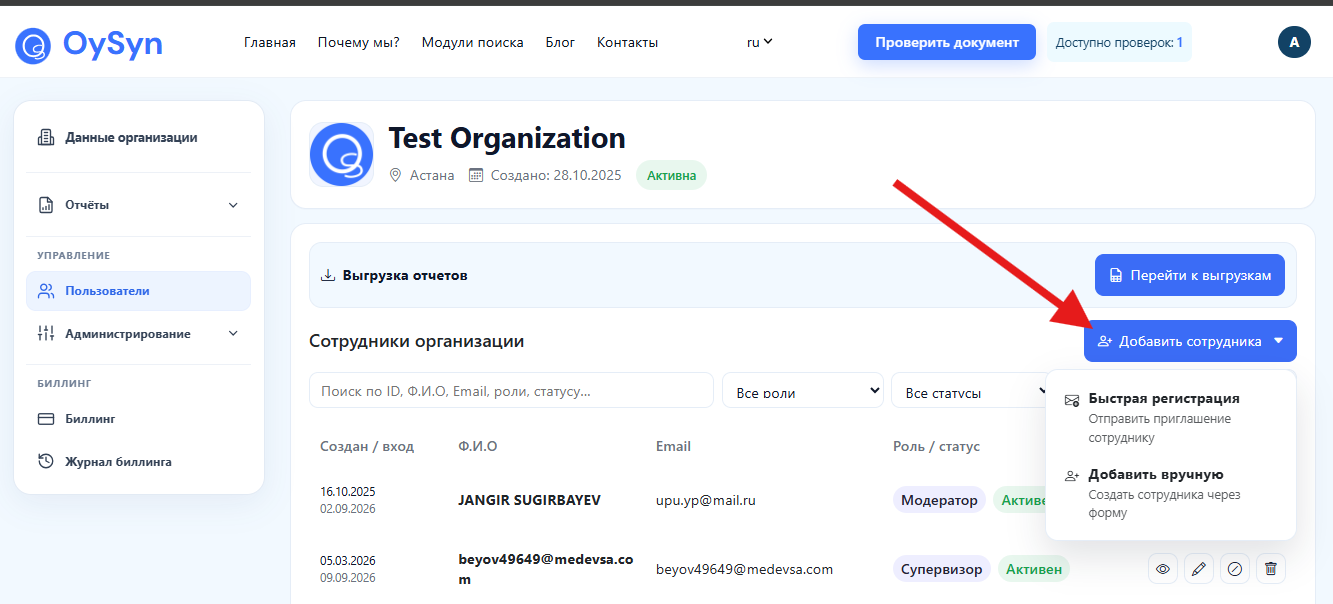
“Quick registration” section.
In the “Quick registration” section you enter the email, role and number of available checks for the user; after you click “Create and send access”, the user receives an email through which they can sign up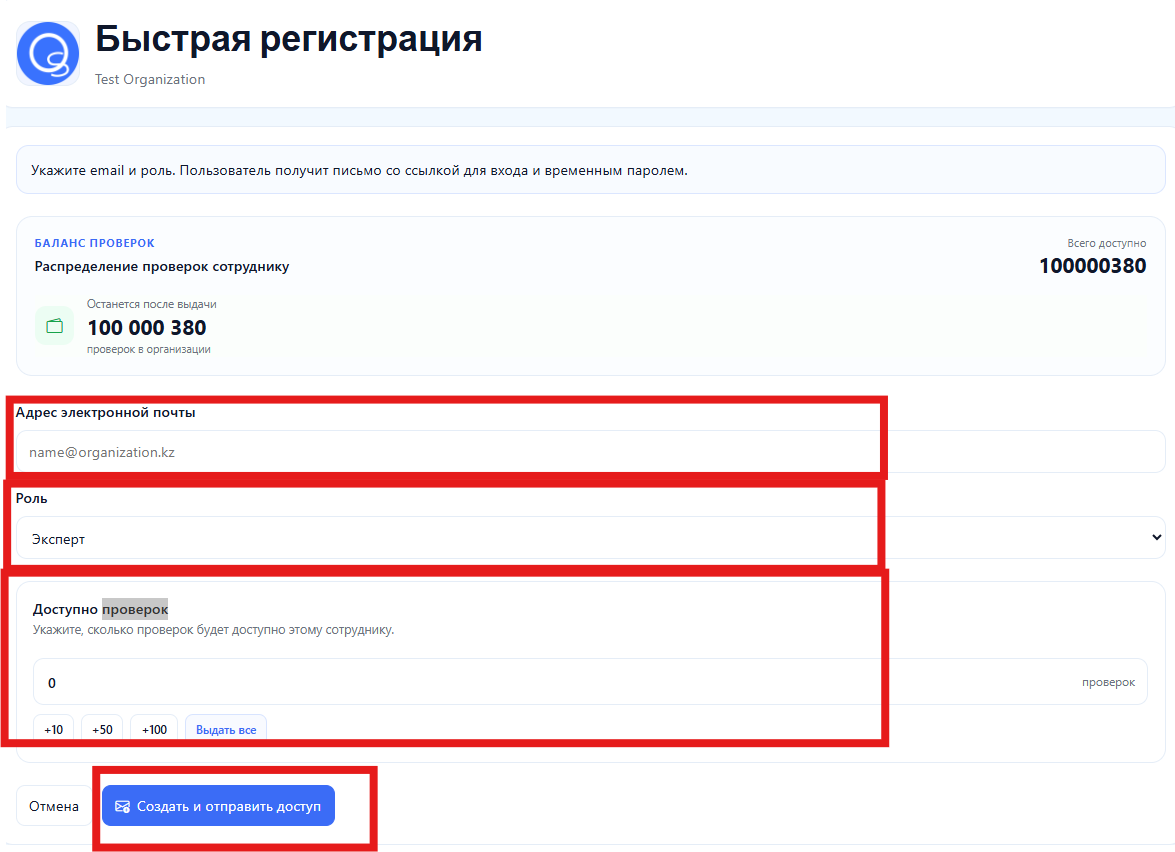
“Add manually” section.
In the “Add manually” section you fill in the form: Email address, Username, Role, Number of available checks, First name, Last name, Patronymic, Password and its confirmation.
In the form, enter how many checks to give the new employee.
⚠️ NOTE: allocated checks are immediately deducted from the organization's total number of checks.
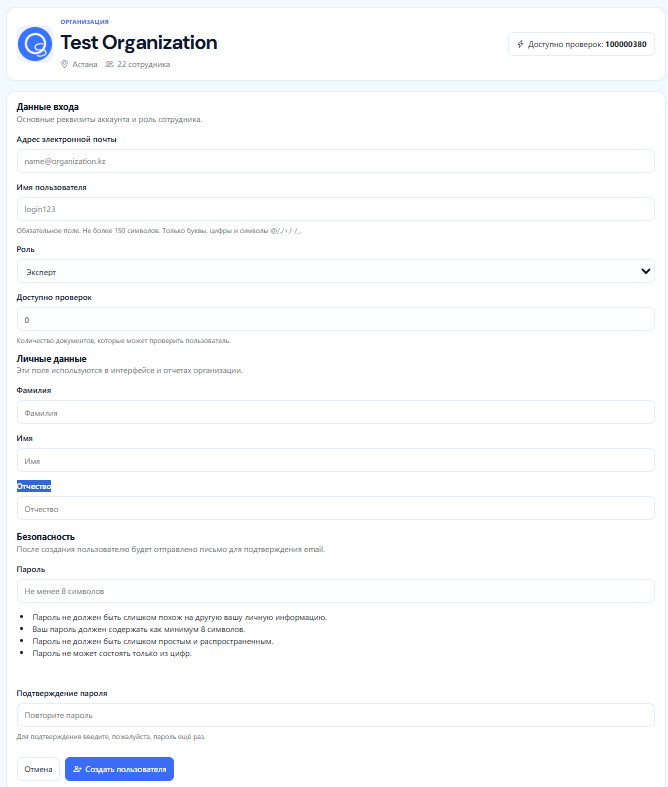
Click “Create user”.
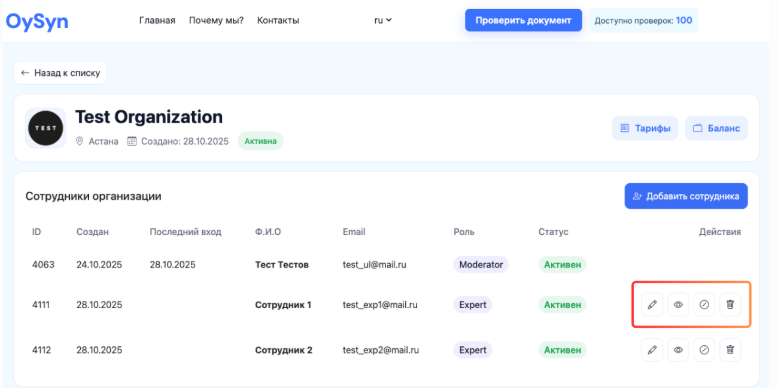
Managing existing employees
The following operations are available for each user:
- Edit details – opens the edit form.
- Impersonate – instantly sign in to their account.
- Block / Activate – temporarily disable access.
- Delete – remove the employee from the organization completely.
“Billing” section
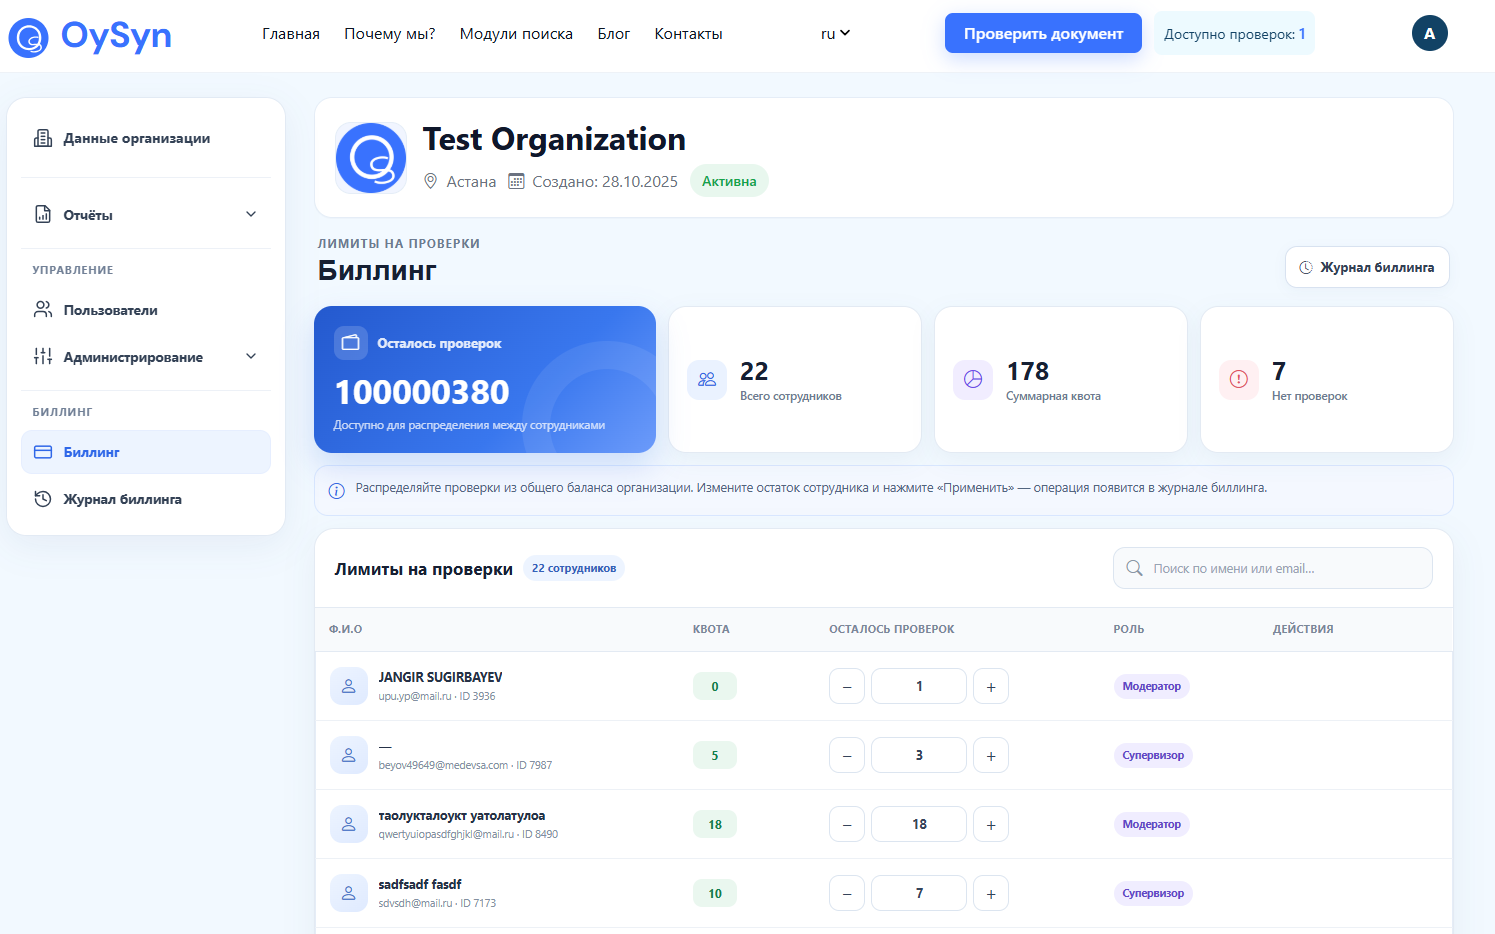
Go to the section “Billing”.
Allocating / adjusting quotas
- Find the employee in the table.
- Click “+”to increase their quota, or “–”to decrease it.
- Click the “Apply”
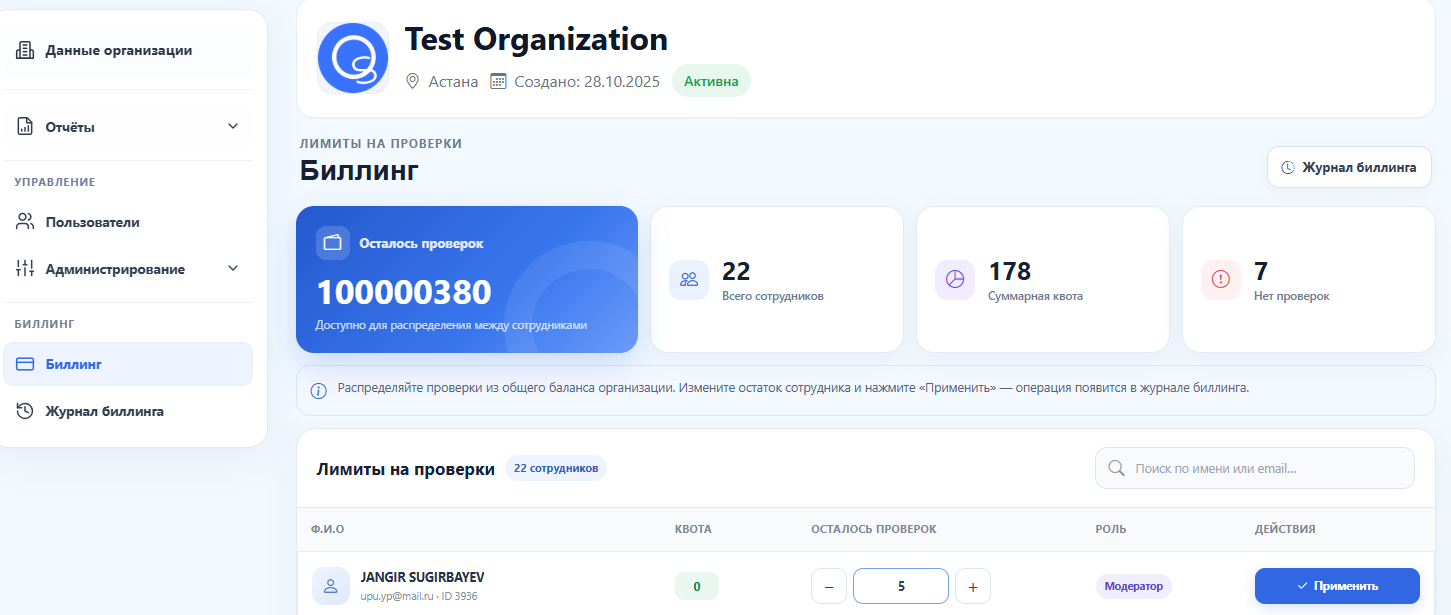
Important: the administrator must also allocate a quota to themselves, otherwise they cannot run checks.
Organization summary
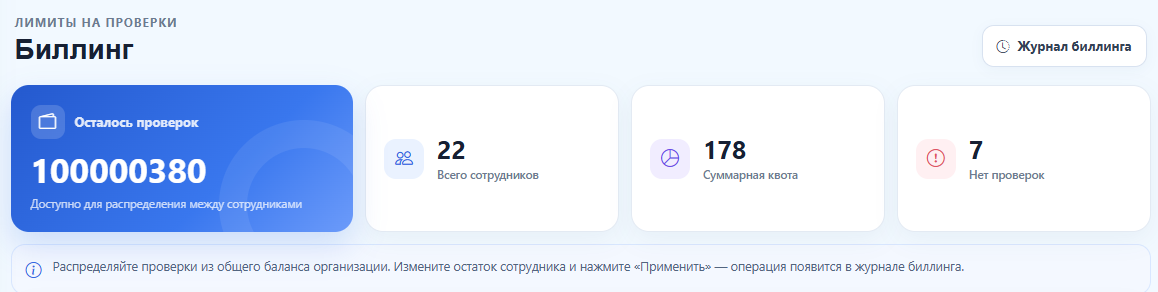
The top of the section shows:
- Checks remaining on the organization's balance (excluding those already allocated)
- Number of employees
- Total quota allocated to employees
- Number of users without checks
“Buy checks” section
The number of available checks is shown at the top: “Checks available: #”.
If you have run out of checks, first ask your organization's administrator to allocate more checks.
If you need to buy more checks, go to the section “Buy checks” section.
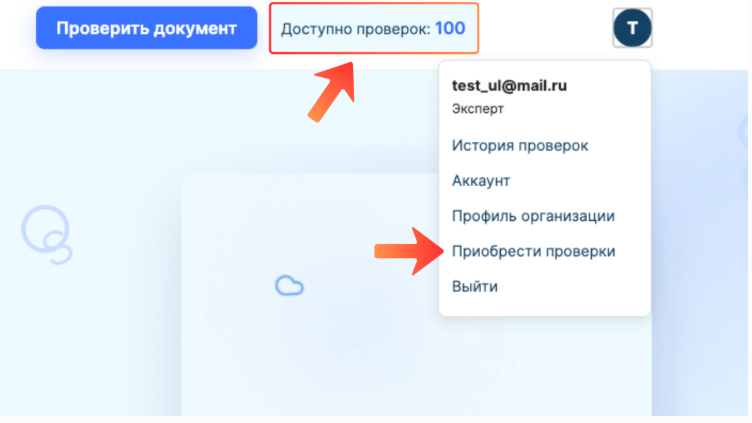
On the right you can see the price per check depending on the volume. In the calculator, enter the number of checks you need.
Click “Pay now”.
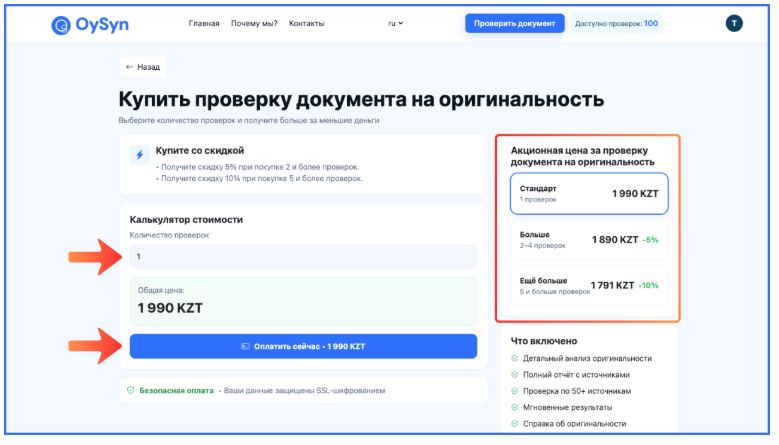
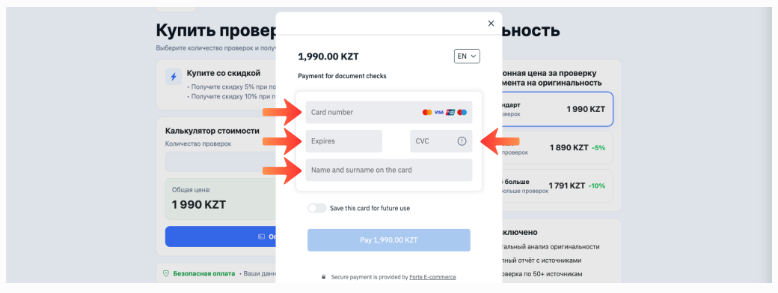
Enter your card details: number, expiry date, CVV, first and last name in Latin letters. Click “Pay”.
“Check history” section
Go to the section “Check history”.
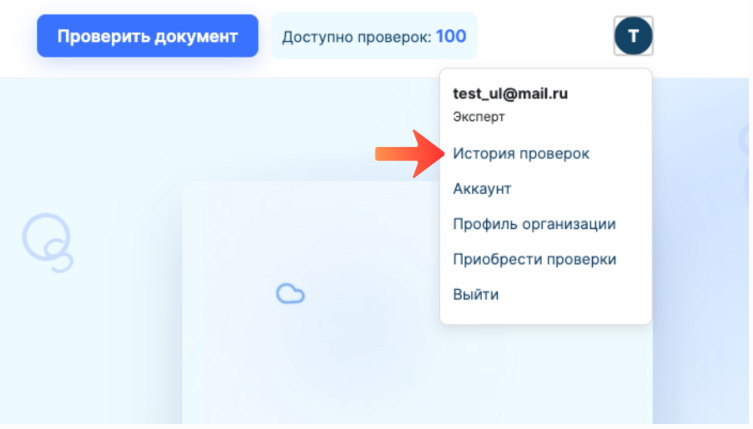
This section shows the full list of checked documents.
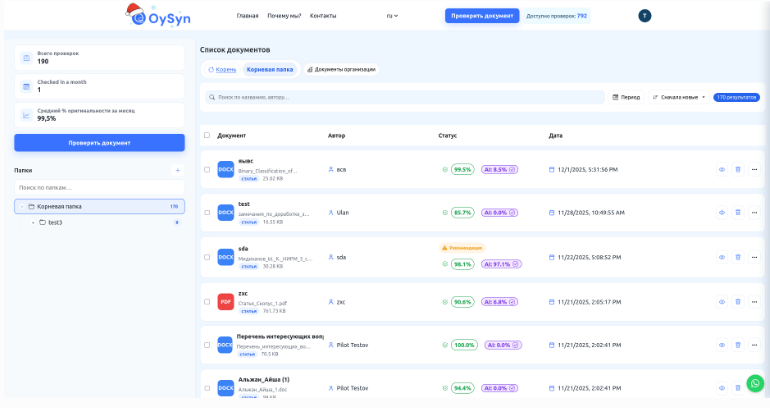
Detailed report: click “View report”.
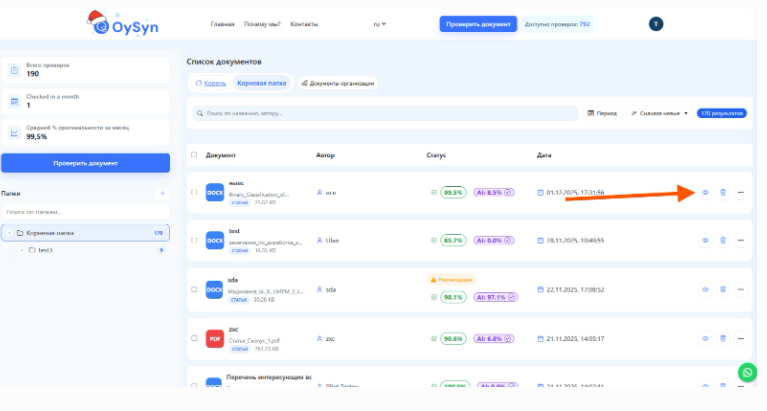
The report contains all the check data.
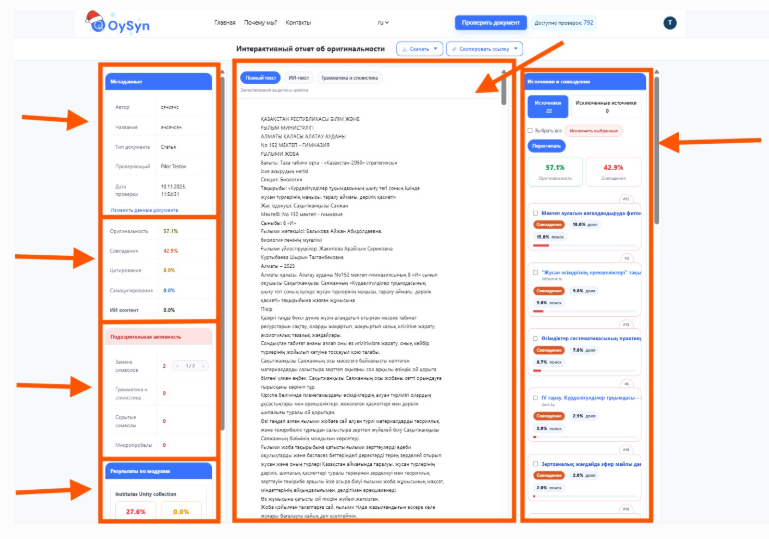
Page layout:
- Left panel
– document metadata;
– check results in figures (originality, matches, citations, AI content);
– Suspicious activity (Character replacement, grammar and style, hidden characters, Micro-spaces);
– detailed results for each module. - Central panel
– the full text of your work;
– color highlighting: all matches are highlighted in color;
– hovering over a highlighted fragment shows a card with a link to the source; follow it to view the source of the borrowing. - Right panel
– Sources and matches;
– excluded sources;
– The Recalculate button excludes the sources you selected and recalculates the originality percentage.
Original text
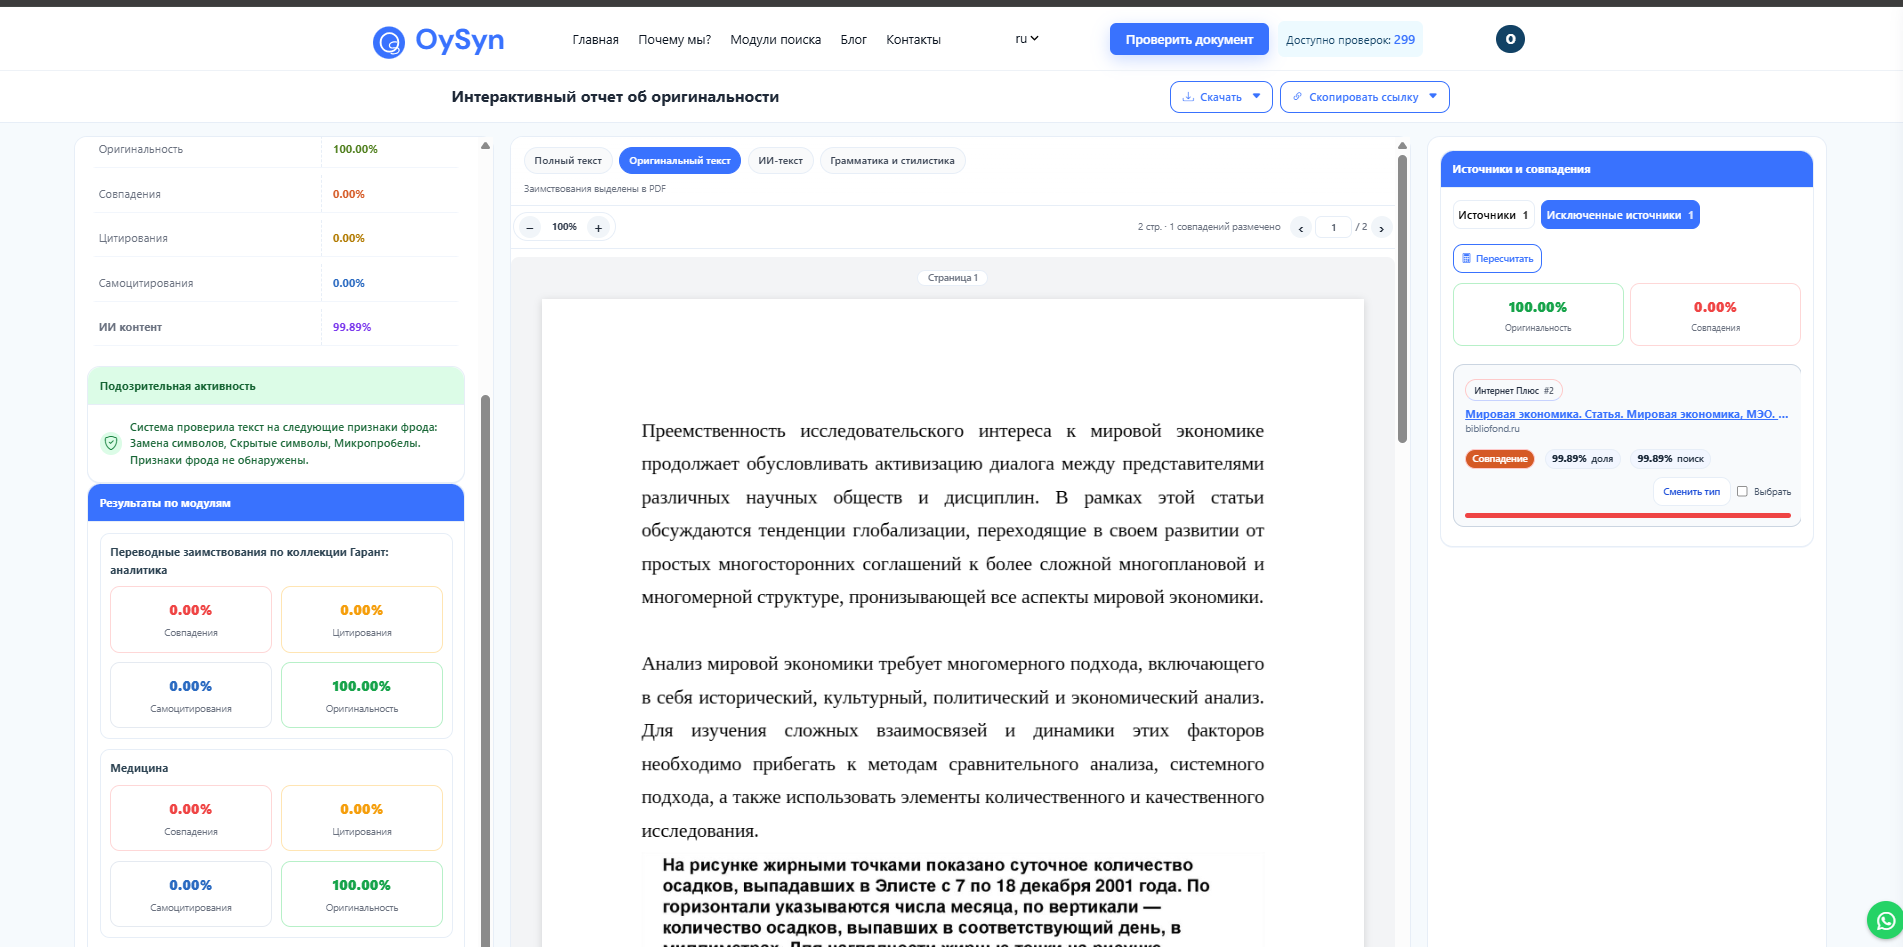
Page layout:
- Left panel
– document metadata;
– check results in figures (originality, matches, citations, AI content);
– Suspicious activity (Character replacement, grammar and style, hidden characters, Micro-spaces);
– detailed results for each module. - Central panel
– the full original text of your work;
– color highlighting: all matches are highlighted in color;
– hovering over a highlighted fragment shows a card with a link to the source; follow it to view the source of the borrowing. - Right panel
– Sources and matches;
– excluded sources;
– The Recalculate button excludes the sources you selected and recalculates the originality percentage.